# Getting Started
TL;DR: Already have Parcel installed? Skip to Uploading Data.
# Setup
To integrate with Parcel in your application, you can either use our TypeScript client or hit our REST APIs directly. For modern JavaScript or TypeScript projects, we recommend you use our client library. For other projects, you'll need to work directly with our REST APIs. We hope to roll out client libraries for other platforms in the future.
# Parcel TypeScript Client
Our Parcel TypeScript client targets modern JavaScript. For the server-side applications, you need to run Node.js 14 or newer. Please refer to the Node.js website (opens new window) for the installation method most suitable for your platform.
# Parcel REST API
While these tutorials focus on using our TypeScript client, you can also make calls directly to our REST API with your developer credentials. You can view the full list of supported endpoints with our Parcel API reference.
# Install
You can install the TypeScript client package (opens new window) with:
npm install @oasislabs/parcel
Now you're ready to use the client within a TypeScript project:
import Parcel from "@oasislabs/parcel"
If you're writing your application in JavaScript, be sure your package.json
file enabled ES modules (opens new window):
{
  "type": "module",
}
# Authentication
In order to use Parcel services, you will need to register your application with us, as well as one or more clients for your application. We support three types of client authentication:
Backend clients also authenticate via OAuth 2.0 using a client ID and redirect URL pair. In addition, the authentication is done in combination with your backend service (e.g. the website) which uses the private key of the client to complete the authentication.
Frontend clients authenticate via OAuth 2.0 using a client ID and redirect URL pair. You should use frontend clients when it's not possible to safely access the private key. For example, you might register a frontend client for your static single-page web or mobile app.
Service clients authenticate using the public-private keypair. You should use service clients wherever it's safe to access a private key and there is no user interface involved. For example, you might register a service client for a cron job or some other headless background tasks.
You may register one or more clients for your application. For example, if you are building a recipe sharing application, you might register one application and four associated clients:
|- Application: My Recipe Upload App
   |- Backend client: Website
   |- Frontend client: Android application
   |- Frontend client: iOS application
   |- Service client: Cron job service
# Generating the Keypair
For the backend and service clients you will need to generate a P256 ECDSA keypair in the JSON Web Key (JWK) (opens new window) format.
Your keypair will have two parts, the public key and the private key. Your public key is safe to share and you will register that with us in our developer portal. Your private key is sensitive and should never be shared. Oasis Labs does not need and will never ask for your private key.
You can recognize a private key by a d field. A public key does not have it.
Here are a few common ways to generate keypairs:
# Node.js
In Node.js we tested the jose library to generate a keypair:
/**
 * Locally and securely generates a JWK and dumps
 * the keypair in JSON format (for the secret keeper)
 */

import fromKeyLike from 'jose/jwk/from_key_like';
import generateKeyPair from 'jose/util/generate_key_pair';

const alg = 'ES256';
const keypair = await generateKeyPair(alg);
const [publicKey, privateKey] = await Promise.all(
  [keypair.publicKey, keypair.privateKey].map(async (k) => {
    const jwk = await fromKeyLike(k);
    return {
      alg,
      use: 'sig',
      ...jwk,
    };
  }),
);


console.log('========== Public Key ===========');
console.log(JSON.stringify(publicKey));
console.log('========== Private Key ==========');
console.log(JSON.stringify(privateKey));
console.log('=================================');
Suppose you saved the snippet above as keygen.js, you can execute it to
generate and output the keypair in the JSON format as follows:
$ node keygen.js
========== Public Key ===========
{"alg":"ES256","use":"sig","kty":"EC","crv":"P-256","x":"qyea2InZ9rA-vwFdXLS5GFyqgqXwZOtGK1FPKxCLHqk","y":"MYWKhXtoVuDbukTo7qfXzlIDshi1SeojNQ3HSz117O8"}
========== Private Key ==========
{"alg":"ES256","use":"sig","kty":"EC","crv":"P-256","x":"qyea2InZ9rA-vwFdXLS5GFyqgqXwZOtGK1FPKxCLHqk","y":"MYWKhXtoVuDbukTo7qfXzlIDshi1SeojNQ3HSz117O8","d":"9RiQC1F6al90dbqs4iDpiOkpJIpnlYJZ4i474qzH6Ns"}
=================================
# Python
To generate a keypair in Python, you can use the jwcrypto library. The
following commands will generate and print a public-private keypair:
  $ pip3 install jwcrypto
  $ python3 -c "from jwcrypto import jwk; key = jwk.JWK.generate(kty='EC', crv='P-256', alg='ES256', use='sig'); print(key.export(private_key=False)); print(key.export())"
  {"alg":"ES256","crv":"P-256","kty":"EC","use":"sig","x":"qyea2InZ9rA-vwFdXLS5GFyqgqXwZOtGK1FPKxCLHqk","y":"MYWKhXtoVuDbukTo7qfXzlIDshi1SeojNQ3HSz117O8"}
  {"alg":"ES256","crv":"P-256","d":"9RiQC1F6al90dbqs4iDpiOkpJIpnlYJZ4i474qzH6Ns","kty":"EC","use":"sig","x":"qyea2InZ9rA-vwFdXLS5GFyqgqXwZOtGK1FPKxCLHqk","y":"MYWKhXtoVuDbukTo7qfXzlIDshi1SeojNQ3HSz117O8"}
The first printed line is your public key and the second printed line is your private key.
# Golang
To generate a keypair in Golang, you can use the jwk-keygen library. The
following commands will generate and print a public-private keypair:
  $ go get -u gopkg.in/square/go-jose.v2/jwk-keygen
  $ $GOPATH/bin/jwk-keygen --alg=ES256 --use=sig
  ==> jwk_ES256.pub <==
  {"use":"sig","kty":"EC","crv":"P-256","alg":"ES256","x":"qyea2InZ9rA-vwFdXLS5GFyqgqXwZOtGK1FPKxCLHqk","y":"MYWKhXtoVuDbukTo7qfXzlIDshi1SeojNQ3HSz117O8"}
  ==> jwk_ES256 <==
  {"use":"sig","kty":"EC","crv":"P-256","alg":"ES256","x":"qyea2InZ9rA-vwFdXLS5GFyqgqXwZOtGK1FPKxCLHqk","y":"MYWKhXtoVuDbukTo7qfXzlIDshi1SeojNQ3HSz117O8","d":"9RiQC1F6al90dbqs4iDpiOkpJIpnlYJZ4i474qzH6Ns"}
The line following ==> jwk_ES256.pub <== is your public key, as denoted by the
.pub extension. The line following ==> jwk_ES256 <== is your private key.
# Web
If you have trouble getting the tools above to work, you can generate a keypair
directly from the Parcel developer portal. Click on the Create client in your
app and then on the Generate button in the top-right corner of the Public
key text area:
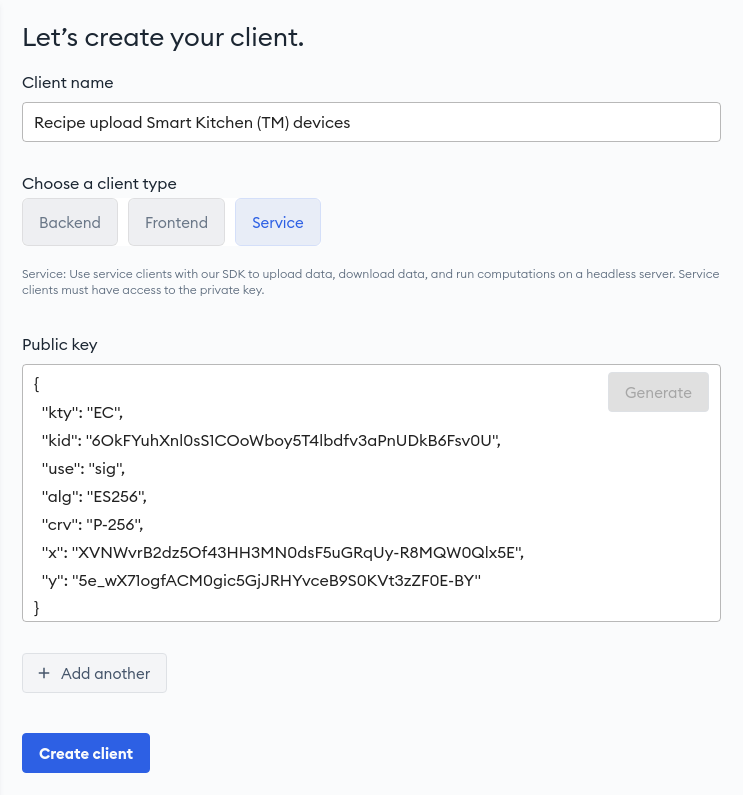
This will generate a keypair inside your browser, populate the Public key field and open a dialog to download the private key.
WARNING
Generating a keypair in the Parcel developer portal is useful for testing. When you are ready to deploy your product and start handling sensitive data, we strongly recommend that you generate the keypair offline outside the browser to reduce the risk of compromising the key.
# Registering Credentials
Once you've generated your keypair, you can register a client in our developer portal in order to use the Parcel SDK or an API.
To register your credentials with us:
Log in to the Parcel developer portal (opens new window).
Click on Create my app (opens new window).
Fill in basic information about your app.
Add a permission to your app. This will be shown to new users when your app requests permissions to use their data.
Click
Create clientfrom your app's info page.Select the appropriate client type. For now, let's begin by registering a
Serviceclient which we will use in the first tutorial.Paste in the public key you generated above. It is also good practice to associate a unique key ID (
kid) with your keypair, so you can discriminate between the keys more easily, if you use more than one. If you providedkidwhen registering your public key though, you must also provide it in your private key during the authentication.Note: When submitting the public key, which is safe to share with us, always check that it does not contain the
dfield in its JSON body.Click
Create client. You should now see a Client ID for the client you just registered. Make sure to save this for use with the Parcel SDK later.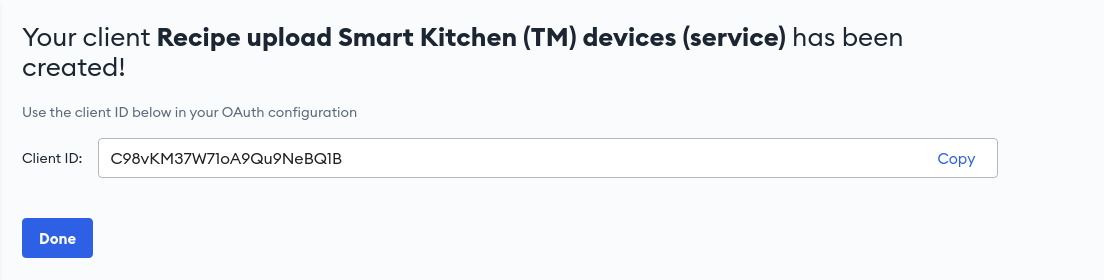
WARNING
Never share your private keys with us, or anyone else. If you believe your private key has been improperly shared, please delete the associated client from our developer portal, generate a new keypair, register the new public key, and use the new private key.
# Using Credentials
Now that our credentials are registered, we are ready to start using the SDK!
It's as simple as importing the Parcel client:
import Parcel from "@oasislabs/parcel";
And creating a new Parcel instance with our credentials assuming you've exported your Service client ID (provided to you in the developer portal) and your private key as environment variables:
const parcel = new Parcel({
  // e.g. "CPoxXkdvFsrqzDdU7h3QqSs"
  clientId: process.env.PARCEL_CLIENT_ID!,
  // e.g. JSON.parse("{kty:'EC',alg:'ES256',use:'sig',crv:...}")
  privateKey: JSON.parse(process.env.PARCEL_PRIVATE_KEY!),
});
You should now be able to use your parcel instance to interact with Parcel
services. You can confirm by calling:
const myIdentity = await parcel.getCurrentIdentity();
console.log(myIdentity.id);
Which yields the Parcel identity of your app:
IN2HfWSmG8c6AiWG2RLwzAu
# Next Steps
Nice work! You're ready to start using Parcel in your application.
The following tutorials will walk you through storing data, managing access, and running confidential computations so you can build great features for your customers while keeping their data private and secure.